
#2. Drop the necessary stitches.
I dropped one full 12 stitch repeat to make sure I didn't make any mistakes following my pattern. Do this one or two stitches at a time - carefully is the byword here.
Since this is lace, I made sure to drop back to a purl row, that way I knew I had the right number of stitches and they were all the same. Dropping back to a knit row would have meant coping with yarn overs and knit togethers - why do that if you don't have to? The green locking stitch marker neatly holds the strands I've unravelled. It keeps the strands from tangling and me from using the wrong strand to knit with.

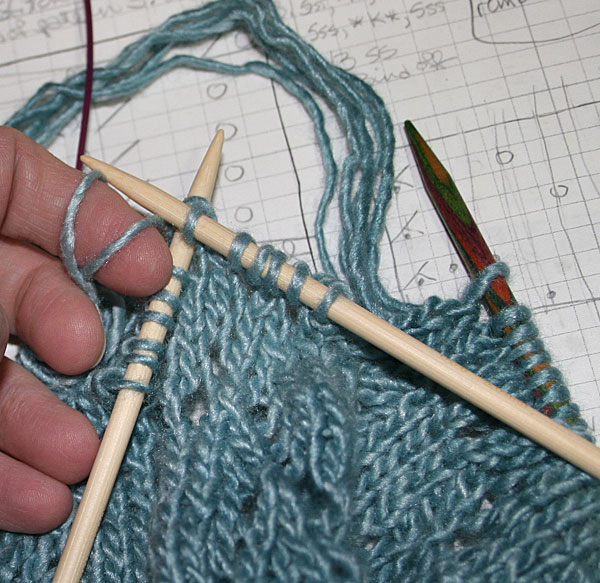
#3. Place the dropped stitches on a dpn one by one as you unravel them.
I've read that you should put the dropped stitches on a dpn that's a size or two smaller than the original needle. I don't agree with this as it boogers up my tension, so I use the same size. It makes it a little tougher to do the last couple of stitches in the group, but I think it looks better in the end. If you have trouble picking up the stitches with the working size needle, use a smaller one, then transfer them.
#4. Put a stitch holder on the needle you haven't gotten to yet so those stitches are secure as well.
The only loose stitches should be the ones you've dropped on purpose. (Since I was knitting this on a circular needle, I just pulled the two sides of the needle through so the stitches were on the cable instead of the needle - I'm kinda lazy.)
#5. Knit.
Carefully select the correct strand of yarn by seeing which is closest to the dpn your stitches are on. Take that one strand out of the locking stitch marker and using another dpn knit it as per your pattern. I use my pinky to control the tension until there is too little yarn to grip, then I pinch it between index finger and thumb.

#6. Purl.
I purl back to try to keep my technique as similar to the original knitting as possible. Purling back is also a good idea because your tension might be different at the beginning of a row where you have more yarn to work with than at the end of the row when the yarn is tight. Working both ways will help even this out a bit. If you hate purling, it is possible to knit the purl rows too by not turning your work and always starting at the right hand side since the work in on dpn's.

#7. Tah-dah!
When you have completed all of your reknitting, just take the stitch holder off your right hand needle, knit the stitches off the dpn, then move on to the left needle.
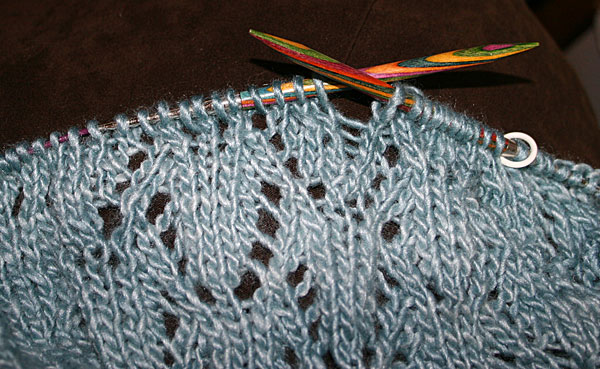
Your repair probably won't look identical to your original knitting, but massage it a bit both while it's dry and when it's blocking, and nobody besides yourself will ever be able to tell. (Unless, of course, you point it out to another knitter, who will say, "Oh, yeah, I see," but be impressed nonetheless.)


1 comment:
Well, I am pretty much amazed just watching you do that.
And take photos of yourself doing that.
Post a Comment